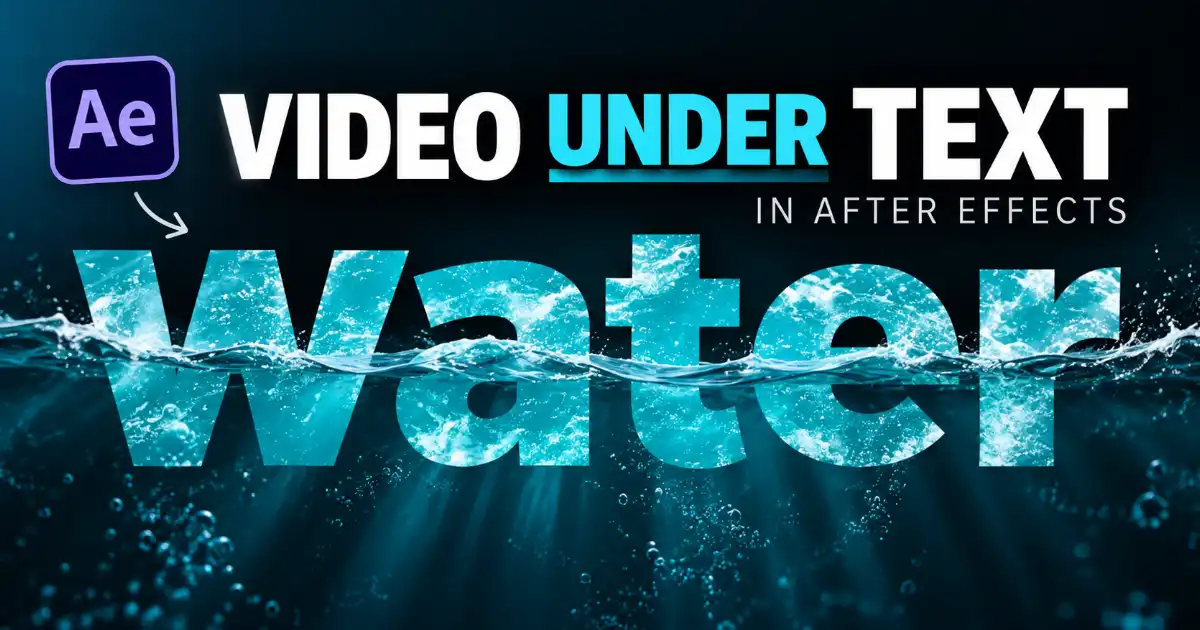
Have you ever seen those eye-catching titles where a video plays right inside the letters? Waves crashing inside the word “OCEAN,” flames flickering inside “FIRE,” or clouds drifting through “SKY.” It looks like something that would take hours to build, but in Adobe After Effects it takes just a few minutes once you know the trick.
In this tutorial, I will show you exactly how to place a video under text in After Effects using a feature called Track Matte. I am keeping this beginner friendly, so even if you have just opened After Effects for the first time, you will be able to follow along. For my example, I am using a water video inside the word “WATER,” but you can use any footage and any word you like.
What Is a Track Matte?
Before we jump in, let me quickly explain the idea behind this effect. A track matte lets one layer decide which parts of another layer are visible. In our case, the text layer acts as a stencil. Wherever the letters exist, the video shows through. Everywhere else, the video is hidden. So instead of seeing a full rectangle of water footage, you only see the water inside the shape of your text.
Once you understand this simple concept, you can use it for far more than text. You can put video inside shapes, logos, and even hand-drawn masks. But let’s start with the basics.
Step One: Create a New Composition
Open After Effects and create a new composition. You can do this by going to Composition and then New Composition, or by pressing Ctrl + N on Windows or Cmd + N on Mac.
In the Composition Settings window, give your composition a name and set the duration to three seconds (0:00:03:00). Three seconds is plenty for a short text reveal or a social media clip, but feel free to make it longer if your video footage is longer. I usually go with a standard 1920 x 1080 resolution, but if you are making content for Reels or Shorts, you can choose a vertical 1080 x 1920 size instead.
Click OK, and your empty composition is ready.
Step Two: Add Your Text
Now select the Type Tool from the toolbar at the top, or press Ctrl + T on Windows or Cmd + T on Mac. Click anywhere inside the composition window and type your word. I am typing “WATER” because it matches the footage I am going to use.
Next, increase the font size. I set mine to around 450 pixels. You want the letters to be big and chunky, because the bigger the text, the more of the video you will see inside it.
Step Three: Center the Text
With the text layer selected, open the Align panel. If you cannot see it, go to Window and then Align. Click the “Align Horizontal Center” and “Align Vertical Center” buttons to place your text right in the middle of the composition.
Step Four: Import Your Video
Now it is time to bring in your footage. Go to File, then Import, then File, or simply press Ctrl + I on Windows or Cmd + I on Mac. Browse to your video and click Import. I am importing a clip of flowing water.
If you do not have your own footage, there are plenty of free stock video sites like Pexels, Pixabay, and Mixkit where you can download high-quality clips without paying anything.
Step Five: Place the Video Below the Text
Drag your video from the Project panel into the timeline. The important thing here is the layer order. The video layer must sit below the text layer. If the video lands on top, simply click and drag it down in the timeline so the text layer is above it.
At this point, you will only see the video covering the whole screen, and that is completely normal. We have not applied the magic yet.
If your video is smaller than your composition, select the video layer and press S to open the Scale property, then increase it until it fills the frame.
Step Six: Set the Track Matte
This is the step where everything comes together. In the timeline, look for the Track Matte column. If you do not see it, press F4 or click the “Toggle Switches / Modes” button at the bottom of the timeline to reveal it.
On the video layer, find the Track Matte option and change it to your text layer, which in my case is named “WATER.” In newer versions of After Effects (2023 and later), you can choose the text layer directly from the dropdown or use the pick whip to connect them. By default it uses Alpha Matte, which is exactly what we want.
If you are using an older version of After Effects, the column is labeled TrkMat. Set it to “Alpha Matte” and make sure the text layer sits directly above the video layer, because older versions always use the layer immediately above as the matte.
As soon as you do this, the text layer becomes invisible and the video only appears inside the letters.
Step Seven: Preview Your Animation
Press the Spacebar to play the preview. You should now see your video playing inside the text. In my case, the water flows beautifully inside the word “WATER,” and it looks far more alive than plain colored text.
If some parts of the letters look empty or boring, select the video layer and move it around with the Selection Tool until the best part of the footage shows through the text.
Common Problems and How to Fix Them
If the video disappears completely, check that the text is actually over an area of the video. Also make sure you set the matte on the video layer and not on the text layer.
If you see the video everywhere except inside the text, you have probably selected “Alpha Inverted Matte” by mistake. Switch it back to a normal Alpha Matte.
If the Track Matte column is missing, press F4 to toggle the columns in the timeline.
Ways to Take This Effect Further
Once you are comfortable with the basic technique, there is a lot you can play with. You can add a solid color or a dark background layer at the very bottom so the text pops more. You can also duplicate the text layer, keep the copy visible, and give it a stroke so the letters have a clean outline around the video. Animating the text scale or position with a few keyframes also works nicely, because the video stays locked inside the letters as they move.
You can also try other footage and words, like fire inside “HOT,” clouds inside “DREAM,” or city lights inside “NIGHT.” Matching the word to the footage always makes the result feel more intentional.
Placing video under text in After Effects is one of those techniques that looks impressive but is actually very simple once you understand track mattes. You create a composition, add bold text, import your video, place it below the text, and set the track matte. That is really all there is to it.
I hope this tutorial helped you. Try it with your own footage and see what creative combinations you can come up with. If you get stuck at any step, go back and check your layer order and the Track Matte setting, because that is where most beginners slip up.