Falling balls is one of those simple animations that looks great and teaches you a lot at the same time. You get a bunch of colorful circles dropping, bouncing, and settling into a pile, and the whole thing runs on physics instead of keyframes. That means you set it up once and let the software do the heavy lifting.
The best part is that you don’t need to animate a single ball by hand. Cavalry has a dynamics system that handles gravity, collisions, and bouncing for you. I’ll walk you through the exact steps I used, and then I’ll break down what each piece is actually doing so you understand it rather than just copying clicks.
This is beginner friendly. If you’ve opened Cavalry once or twice, you’ll be fine.
Step 1: Draw Your First Ball
Open the Cavalry app and start with a fresh scene. Grab the Ellipse tool from the toolbar on the left side of the screen.
Now here’s the trick for a perfect circle. Hold down the Shift key while you draw, and Cavalry will lock the width and height to the same value. Drag out a small circle somewhere on your canvas. This single circle is the ball that every other ball will be cloned from, so keep it simple and clean.
You only need one. Don’t draw a dozen circles by hand. We’re about to multiply this one automatically.
Step 2: Add a Duplicator
With your circle still selected, look at the top panel and click the Duplicator icon. This wraps your single ellipse inside a Duplicator, which is the tool that creates many copies of one shape.
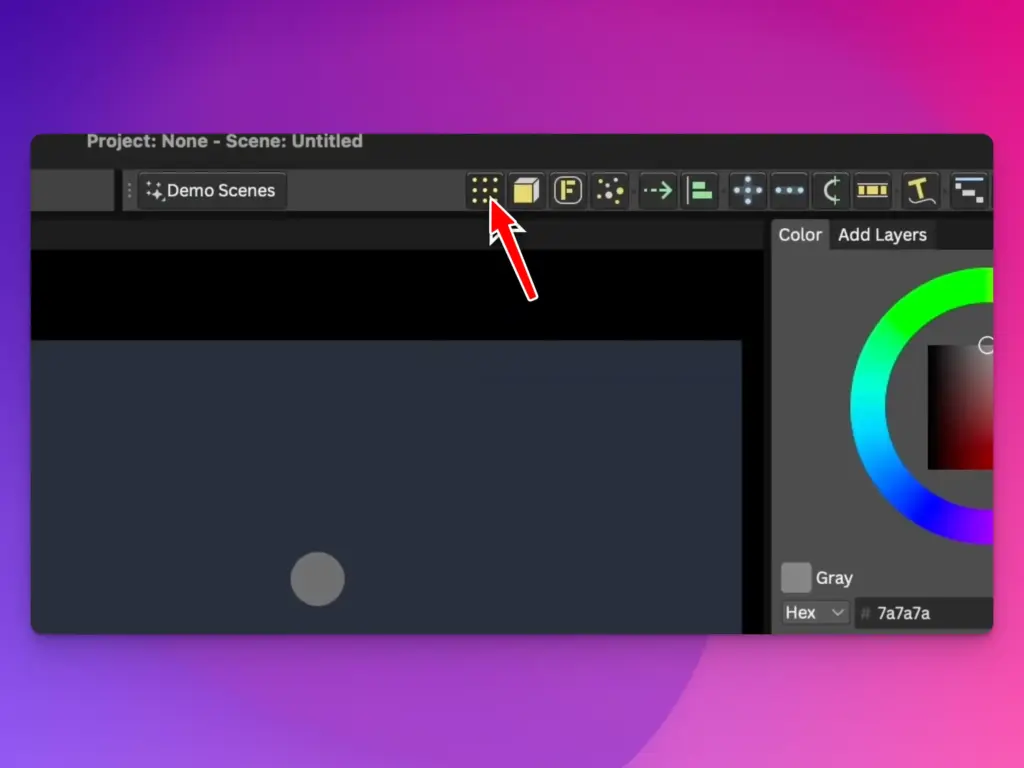
Right away you’ll see your one circle turn into a grid or line of circles. That’s the Duplicator doing its job. The original shape stays as the source, and the Duplicator generates copies based on the settings you give it.
Think of the Duplicator as a copy machine that you can control with numbers instead of pressing the button over and over.
Step 3: Change the Distribution to Random
By default the Duplicator lays your copies out in a neat grid. For falling balls, you don’t want a tidy grid. You want a loose, scattered cloud of circles that can drop and tumble naturally.
Select the Duplicator and find the Distribution setting in its properties. Change it from Grid to Random. Now your circles will scatter across an area instead of lining up in rows.
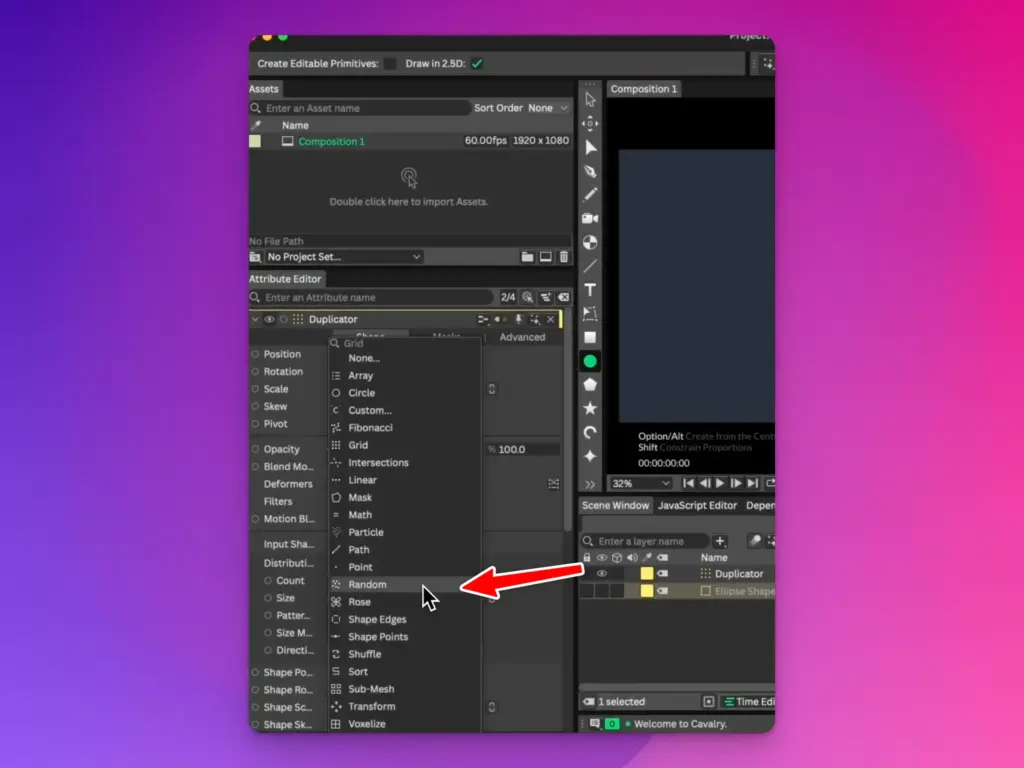
This random spread is what makes the final animation feel organic. Real falling objects don’t start in perfect rows, so neither should ours.
Step 4: Adjust Size and Count
Still inside the Duplicator properties, you’ll see controls for the area that your circles spread across. Adjust the Width and Height values to set how wide and tall the scatter zone is. A wider zone gives the balls more room to spread out before they fall.
Then set the Count. This is simply how many balls you want. Start with something reasonable like 20 to 40. Too many at once can get messy and slow, so build up gradually once you see how it looks.
Play with these numbers a little. Every scene feels different depending on canvas size, so there’s no single correct value here.
Step 5: Set a Relax Value
If you look closely, some of your randomly placed circles probably overlap each other. Overlapping balls cause problems once physics kicks in, because the simulation tries to push them apart all at once and the result looks jumpy.
This is what the Relax setting fixes. Find the Relax value in the Duplicator and turn it up gradually. Relax gently pushes the circles apart so they stop overlapping and sit with clean spacing between them.
Raise it until the circles have a little breathing room and no two are stacked on top of each other. Proper spacing now means a much smoother simulation later.
Step 6: Apply a Color Array for Different Colored Balls
Right now all your balls are the same flat color. The classic falling balls look uses lots of different colors, so let’s fix that.
Go back and select the original ellipse you drew first, not the Duplicator. This matters. The source shape is where the color lives, and the Duplicator reads from it. Apply a Color Array to the fill of that ellipse and add the colors you want.
A Color Array holds a list of colors, and the Duplicator hands them out across all the copies. So instead of one boring color, your balls come out in a cheerful mix. Pick a palette you like and the whole pile instantly looks more fun.
Step 7: Apply Forge Dynamics
Here’s where the magic happens. Select the Duplicator, then click the F icon in the top panel. The F stands for Forge, and this applies Forge Dynamics to your circles.
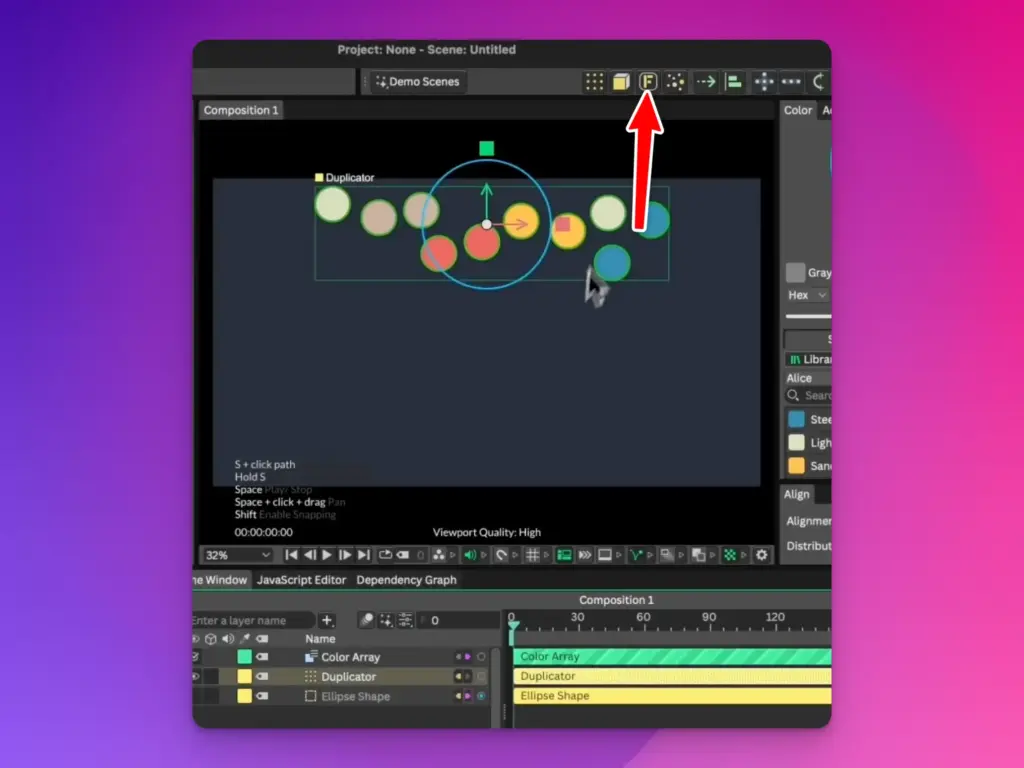
Forge Dynamics is Cavalry’s physics engine. The moment you apply it, every ball becomes a physical object that understands gravity, weight, and collision. They’re no longer just drawings sitting still. They’re now objects waiting to fall.
You won’t see anything move yet, because physics only runs when the scene plays. The setup is done though. One source circle, multiplied, colored, and handed over to physics.
Step 8: Play the Scene
Hit play on your timeline. Watch your balls drop.
Gravity pulls every circle downward, they collide with each other on the way down, and they bounce and settle into a natural looking pile at the bottom. You didn’t keyframe any of it. The simulation worked it all out from the rules you set up.
If it looks too fast, too slow, or too bouncy, just tweak the Forge settings and play again. That back and forth is the whole fun of working with dynamics.
What Forge Dynamics Actually Does
Forge Dynamics deserves a proper explanation because it’s the heart of this animation. It’s a rigid body physics simulation built into Cavalry. In plain terms, it takes your shapes and treats them like solid objects in the real world.
It applies gravity so things fall. It detects collisions so objects don’t pass through each other. It calculates bounce so objects react when they hit something. You feed it shapes and a few settings, and it generates motion frame by frame based on physics rules rather than keyframes you place yourself.
Inside Forge you’ll find values worth knowing. Gravity controls how strongly objects are pulled down. Bounce, sometimes called restitution, controls how much energy a ball keeps after impact, so high bounce means lively jumping and low bounce means a soft settle. Friction affects how much objects grip and slow against each other. Adjusting these three gives you completely different moods from the same setup.
The big advantage is that simulation handles complexity that would be painful to animate by hand. Twenty balls colliding in slightly different ways every frame is something no animator wants to keyframe. Physics does it instantly and it always looks believable, because it follows the same rules our eyes expect from the real world.
That’s a full falling balls animation from an empty scene to a bouncing pile of color. The flow is always the same. Draw one shape, multiply it with a Duplicator, space it out with Relax, color it with a Color Array, then hand it to Forge Dynamics and press play.
Try changing the gravity and bounce values to get different feels, or swap circles for other shapes to see what happens. Once the basic setup clicks, you’ll start seeing physics animations everywhere you look.